Hello, wonderful crafting friends. Hope you're all feeling inspired to create and have been cleaning your crafting space as you go. 😋 I'm the messiest crafter ever and usually have to spend time picking up and putting things away because I've run out of every inch of space possible and lost all my tools under the clutter. HA! When inspiration hits, you just have to run with it, right?
Today's greeting cards go hand in hand with being a bit of a messy crafter. Often my cards will have smudges on them or imperfections, which is expected to some extent as this is a handmade item. I don't really understand how exactly this happens, but it just does. When the smudges can't be erased using a pink eraser, I LOVE splattering my cards with some acrylic paint. Not only does this look cool and artsy, but it's also fun to do and hides any small or large imperfections you may have in your design.
 |
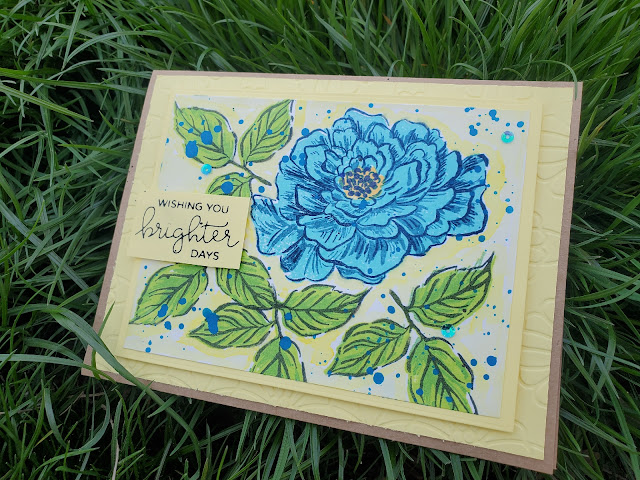
| Card using Catherine Pooler Date Night inks |
In creating this series of cards I picked up a clear peony builder stamp by hip, stamp, hooray, or American Crafts at my local hobby lobby. I went in for paper and came out with a stamp. It's totally acceptable as this stamp was a little over four dollars with the 40% off sale that was happening at the time.
I was in the mood to create some one-dimensional cards instead of the usual layered card I'm used to making. I cut my card bases to just under A2 size, around four inches wide by five and a quarter inches tall. Using my Misti stamping tool I began building my peonies using a combination of inks. I did test out my new Catherine Pooler ink pads from the date night collection and absolutely love them. The flowers with the brighter more vibrant hues are done with date night inks. I also used some distressed oxides, versa fine and dew drop ink pads. Mixing inks is fine as long as you're cleaning your stamp off before going into another ink pad and heat setting your work as you go. Experimentation is always the best teacher.
 |
| I love the bright blue ink splatters! |
Once my flowers were built and the ink set I used some watercolor paint to outline my stamped images and create somewhat of a background. Using a heat gun I dried my watercolor background before applying acrylic paint spatters. You'll want to make sure your paper is dry before applying the acrylic paint to prevent all the liquid from running together and creating a big muddy mess. I used a cardboard box lid from a case of paper as my splatter tray. It's easy to move around my craft room and contains the paint when splattering so it doesn't fly all over the place. For splatter: mix any kind of acrylic paint with a small amount of water, load up your brush and tap away over your image. You may or may not want to cover up your flower from the paint splatter with a piece of scrap paper. I opted not to cover my flowers up and concentrated the paint on my background rather than the blooms. The paint splatter was pretty thick and heavy so I set my cards aside to dry rather than attempting to dry them with a heat gun.
 |
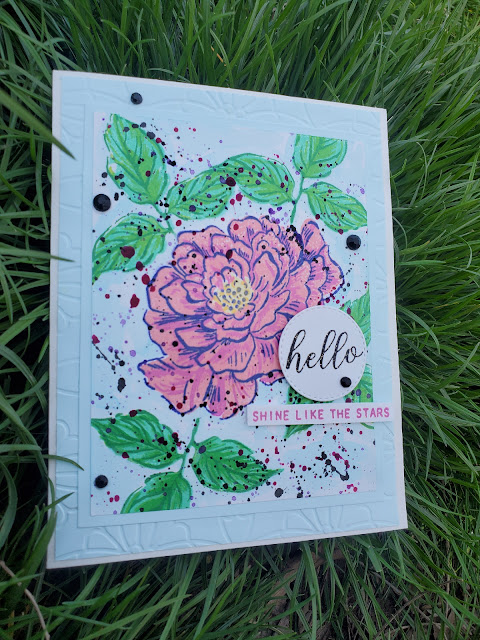
| I love the different colored ink splatters and black gems. |
When my cards were dry I mounted them onto a slightly larger piece of cardstock that corresponded with the color scheme. These layered pieces were mounted to another embossed piece of cardstock and then attached to the card base which was A7 size. I found some sentiments and slapped them on. I have a collection of pre-stamped sentiments that I'm able to pull from to streamline the process a bit. To finish these off, I added some black gems to some cards and some matching colored sequins to others. Use what you have and what you like!
 |
| I used black acrylic paint for the background and an alcohol marker. |
Hope you enjoyed these ink-splattered cards. Remember to use this trick next time you muss up a creation and see if you can save it or make it better!
Thank you for checking out my blog. If you like my content please head over to Instagram and hit the follow button. If you ink splatter a project let me know in the comments section and tell me how it went. Create something messy today! 😀
Comments
Post a Comment