Floral Typewriter Greeting Cards

 Hello crafty friends. Today's post features some really fun typewriter greeting cards with floral accents. I used Spellbinders clear stamp of the month with an accompanying die set for February 2022.
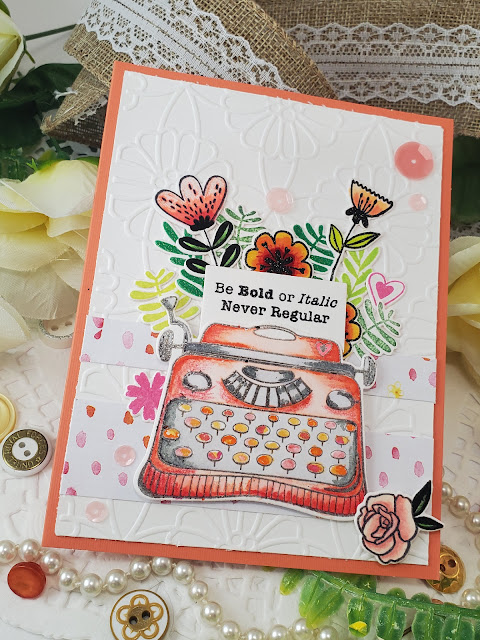
Orange type writer with floral accents on a greeting card. The text reads "Be bold or italic. Never regular"
Love this cute design!

I began by using my Misti stamp tool to lay down these images with some black versa fine ink. I love using the Misti because it ensures you get a usable stamped image. If you don't have one of these in your craft room yet I certainly think it's worth the investment. Next, I heat embossed my stamped images with Wow clear embossing powder. 
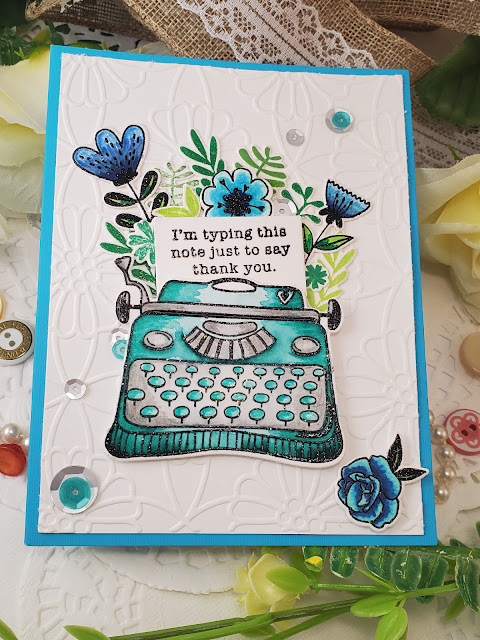
Handmade greeting card featuring a blue typewriter on white embossed card base. The sentiment reads "I'm writing this just to say thank you".
A card I'd love to recieve. 

Coloring in my stamped images was a lot of fun. I used a combination of alcohol ink markers, Tombow brush markers, and colored pencils. Because my images were embossed the clear layer allowed me to use any medium I wanted without fear of smearing the ink. I even used some watercolor on the typewriters simply because I love the way watercolor looks! I wanted to achieve some highlights on the typewriters so a fair amount of experimentation went into how I could do that. It's safe to say these images are mixed media. 

After coloring in my images I used the accompanying die set to cut them out. I composed my images on a white panel after running them through the Spellbinders embossing folder of the month for February 2022. I glued everything in place, added some sequins, and mounted it all to an A2 card. I also experimented with a patterned paper background but much prefer the look of the white embossed background. What do you think? 

Purple typewriter on patterned paper with floral accents.
Testing out the design with patterned paper. 

Thank you for checking out my blog. If you have comments or questions I'd love to hear from you below. Also, if you like my content please follow my Instagram account. Make something beautiful today! 

Comments

Popular posts from this blog

Floral Gold Foiled Greeting Cards

Spellbinders Glimmer of the Month November 2022 Good morning crafty friends. Today I'm sharing with you cards I've made using the Spellbinders glimmer of the month for November 2022, "Glimmer Edge Stylized Floral". One of my favorite features of this month's glimmer plate is that the design is all connected in one piece instead of having separate pieces to manage. This makes foiling and die-cutting a breeze since there's no fussing with aligning all the elements perfectly during the process. You're able to use less foil and cardstock with this design. Thanks, Spellbinders for the efficiency. I also used Spellbinders embossing folder of the month for Nov. 22 to create the background panel. All these cards are A2 size.  Reverse foiling technique colored with distressed oxides. In this first design, I used a reverse foiling technique and a solid plate to pull the leftover image off an already-used piece of foil. I didn't get the foil transfer ...

Tools for New Paper Crafters

Are you a new paper crafter?         Hi crafty friends! If you're here checking out my blog it's because you're a paper enthusiast like me. Today's discussion is for those who are new to the world of paper crafting and are curious about what basic supplies every paper crafter needs in their arsenal to make beautiful pieces they'll love and want to share. Here are my top five supplies or supply groups, that have made all the difference in my creations.      The staples of my craft room are scissors, glues and adhesives, paper, and ink. If you're going to make cards, art journals, collages, or create happy mail you'll need these basic items to get started. Stamps are also another important staple in the craft room, but we'll leave that for another post.  1. Cut   You'll need a large pair of scissors to make bigger cuts for things like taking images out of a magazine. You'll also need a smaller pair for fussy cutting or doing detailed...

Specimen Envelopes

      Good morning my paper-loving friends. I have another upcycle project for you today. I call these specimen envelopes because they feature a clear widow like a slide with a "specimen" in the middle. I've had these envelopes in my stash for a while now. I love them so much, that I haven't been able to part with them. These would make a lovely addition to a happy mail for a pen-pal, a swap, or of course, tucked into a journal. I could also see these tied to the outside of a gift package with a note or a little something extra inside. So, let us get into it.        I used some pages from my German English dictionary for these envelopes. I got out my Gelli plate and swiped some Distressed Oxides onto it and misted it with water before I pressed my paper onto my Gelli plate. If you don't have a Gelli plate a regular craft mat or piece of laminated paper (or any non-porous flat surface) would work just as well. I used my h...