 |
| Spellbinders Glimmer of the Month November 2022 |
Good morning crafty friends. Today I'm sharing with you cards I've made using the Spellbinders glimmer of the month for November 2022, "Glimmer Edge Stylized Floral". One of my favorite features of this month's glimmer plate is that the design is all connected in one piece instead of having separate pieces to manage. This makes foiling and die-cutting a breeze since there's no fussing with aligning all the elements perfectly during the process. You're able to use less foil and cardstock with this design. Thanks, Spellbinders for the efficiency. I also used Spellbinders embossing folder of the month for Nov. 22 to create the background panel. All these cards are A2 size.
 |
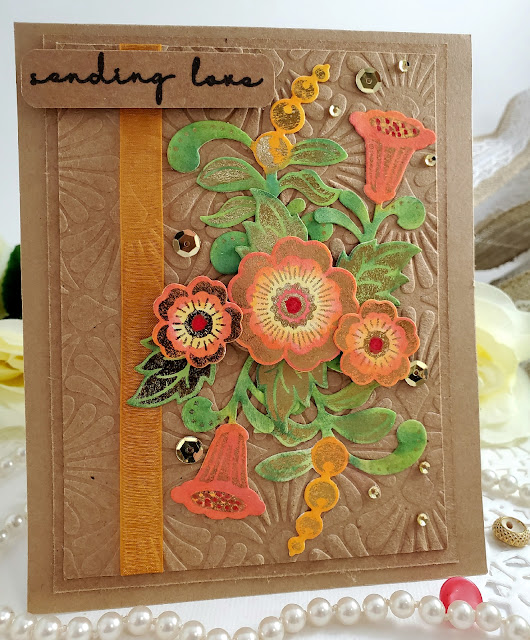
| Reverse foiling technique colored with distressed oxides. In this first design, I used a reverse foiling technique and a solid plate to pull the leftover image off an already-used piece of foil. I didn't get the foil transfer I was hoping for so I added some color to help the design along. Mounting the flowers to craft paper gave the pieces more of a shabby-chic feel. I used distressed oxides to paint the initial color layer then went back over with deeper shades of ink and a dry brush to add depth. I used the "sending love" sentiment from Spellbinders clear stamp of the month for Nov. 22. |
 |
| Intense colors with Jane Davenport colored pencils. I love the vibrancy of colors in this card design. The foil transferred beautifully as well. To color the pieces I used Jane Davenport Magic Wand colored pencils and blended my shades together with Gamisol mineral spirits. The sentiment is from the glimmer plate set. I really like the combination of colors on this card. |
 |
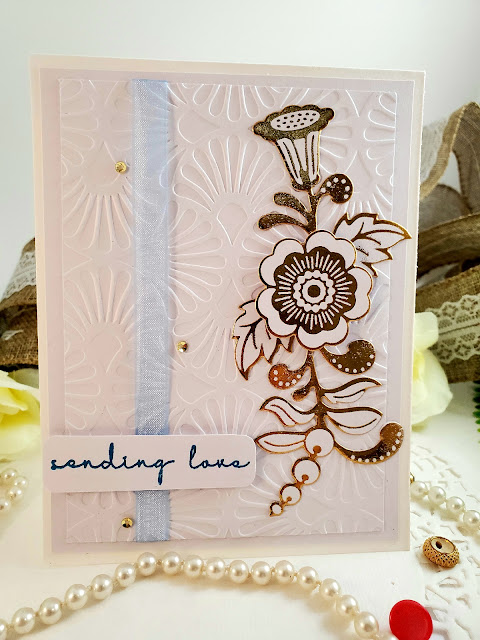
| All-occasions elegant card. |
My next card is simple and elegant. In keeping the color pallet neutral, with the exception of the blue ribbon, I've created an all-occasions card. Using the "sending love" sentiment allows the sender to use this card for just about anything.
 |
| Reverse foiled die-cut elements and Distressed Oxides. |
This card was created using the reverse foiling technique. Again, the foil transfer wasn't the best so I used some distress oxides and a smooshing technique for a watercolor effect. Mounting the embossed panel on a gold background helps elevate the imperfect floral elements. Send this card to someone with their favorite color purple, hehe.
 |
| Pretty patina feel to this card. |
I enjoy the versatility of using foiled elements for card making. Using reverse foiling with a solid plate may not come out perfect, but it still produces nice results. This was my first time using the solid plate, so I'm sure with some practice I'll be able to achieve more of a solid foil transfer.
Thanks for stopping in and checking out my blog. I hope you're feeling inspired and will give some foiling a try today. Hop on over to my Instagram, @craftinbish, to check out more paper crafts and cards. Have a great day!
Comments
Post a Comment