
Specimen Envelopes

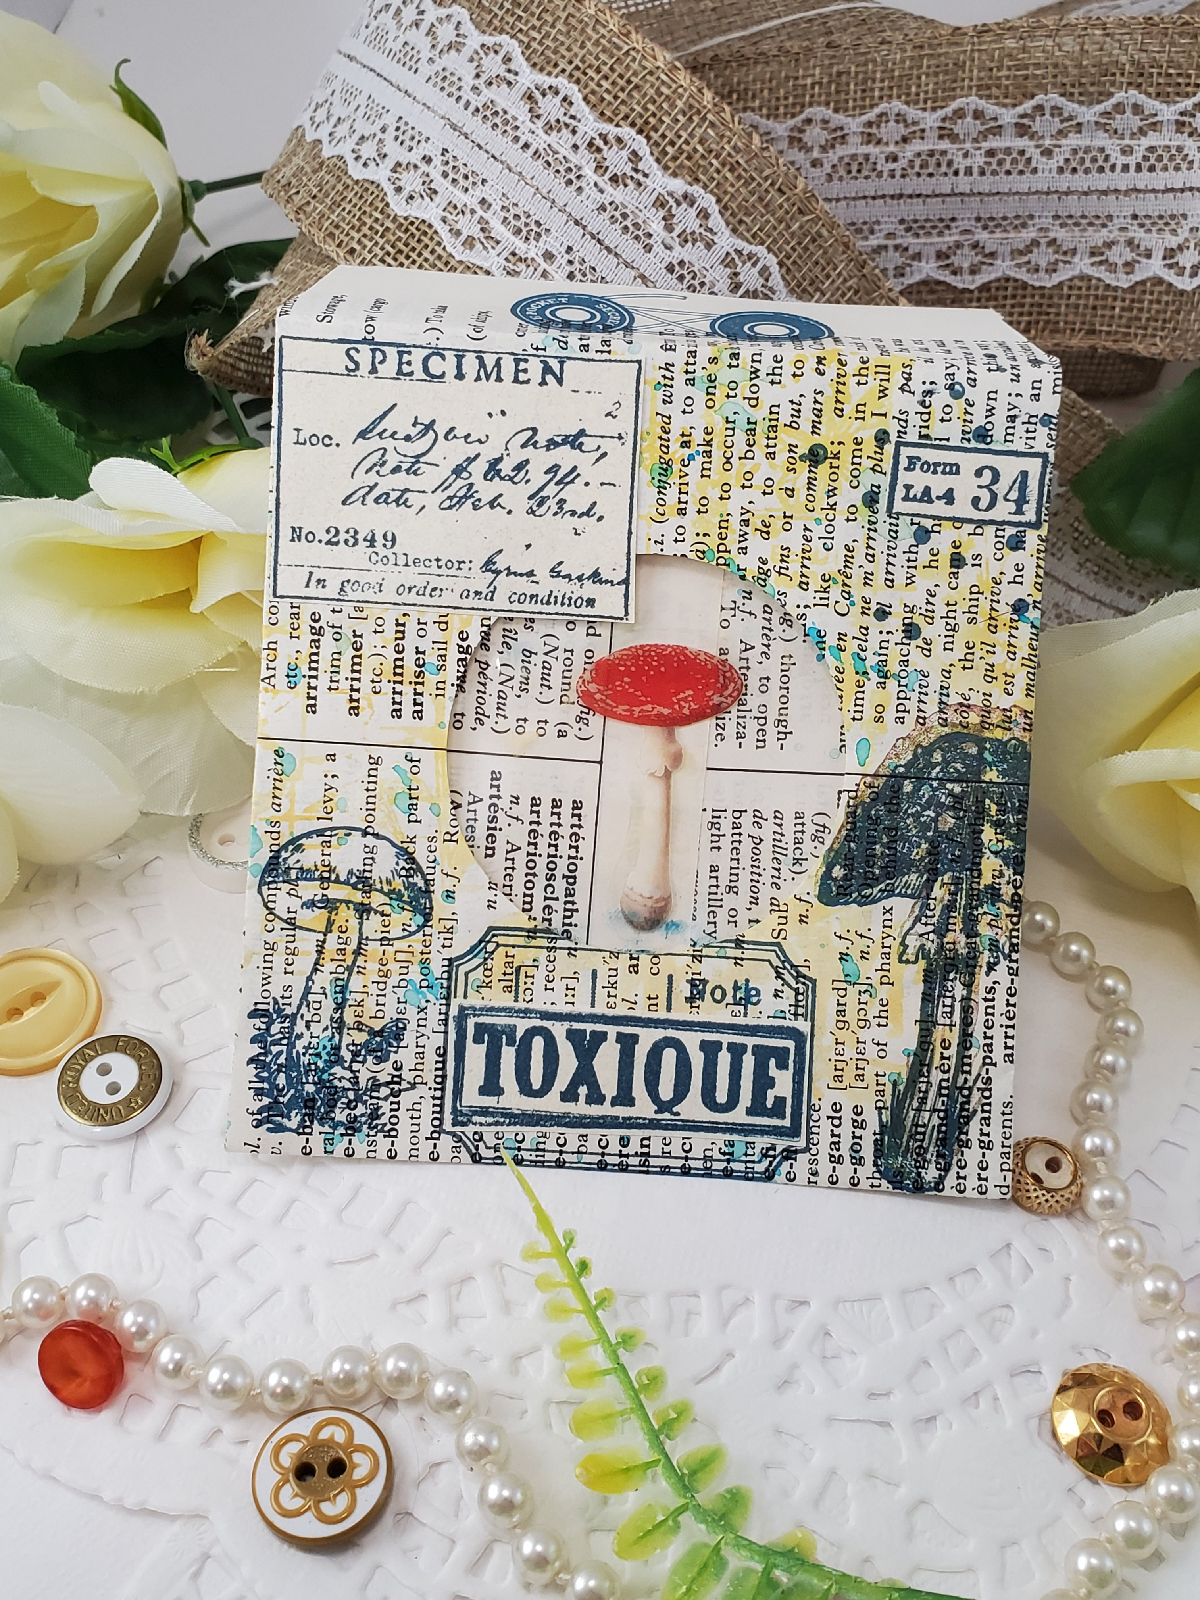
     Good morning my paper-loving friends. I have another upcycle project for you today. I call these specimen envelopes because they feature a clear widow like a slide with a "specimen" in the middle. I've had these envelopes in my stash for a while now. I love them so much, that I haven't been able to part with them. These would make a lovely addition to a happy mail for a pen-pal, a swap, or of course, tucked into a journal. I could also see these tied to the outside of a gift package with a note or a little something extra inside. So, let us get into it. 


     I used some pages from my German English dictionary for these envelopes. I got out my Gelli plate and swiped some Distressed Oxides onto it and misted it with water before I pressed my paper onto my Gelli plate. If you don't have a Gelli plate a regular craft mat or piece of laminated paper (or any non-porous flat surface) would work just as well. I used my heat gun to quickly dry my paper. 


    Next, I folded my papers into envelopes. I did this the old-fashioned way by folding the long sides into the middle and the short sides in only far enough for flaps. Cut your envelope but don't glue it just yet.  After the basic shape of the envelope was in place, I used a circle die and cut my window in the middle. 


    At some point, I added more speckles of distress oxide by flicking a wet paintbrush saturated with ink onto the envelopes. Do that step before adding the plastic for your window. I save clear plastic packaging and have a mountain of it. Any time I make a project that calls for acetate I usually try and upcycle this plastic packaging. I will also use the packaging to wrap swaps in before putting them in an envelope to ensure everything stays in place and is protected. I glued plastic onto the inside of the envelope for a window and picked out a sticker for the middle. If you haven't glued your envelope into its shape, do that now. 

I prefer the look of stickers that are on a clear medium versus the stickers that are washi with a white outline around them. But of course, use what you have. I believe the goal is to have fun at any rate. Once the stickers were in place I stamped on my envelopes. I used a variety of stamps for these envelopes but the images that pulled everything together were from the Tim Holtz field notes collection. I stamped directly onto my envelopes and then onto paper, cut it out, and glued that onto these envies. 

 I hope you've enjoyed today's project. If you try it post a picture in the comments below. If you like my content please hop over to my Instagram and hit the follow button.  Thank you for checking out my blog and happy crafting! 

Comments

Popular posts from this blog

Tools for New Paper Crafters

Are you a new paper crafter?         Hi crafty friends! If you're here checking out my blog it's because you're a paper enthusiast like me. Today's discussion is for those who are new to the world of paper crafting and are curious about what basic supplies every paper crafter needs in their arsenal to make beautiful pieces they'll love and want to share. Here are my top five supplies or supply groups, that have made all the difference in my creations.      The staples of my craft room are scissors, glues and adhesives, paper, and ink. If you're going to make cards, art journals, collages, or create happy mail you'll need these basic items to get started. Stamps are also another important staple in the craft room, but we'll leave that for another post.  1. Cut   You'll need a large pair of scissors to make bigger cuts for things like taking images out of a magazine. You'll also need a smaller pair for fussy cutting or doing detailed cuts in tight

Floral Gold Foiled Greeting Cards

Spellbinders Glimmer of the Month November 2022 Good morning crafty friends. Today I'm sharing with you cards I've made using the Spellbinders glimmer of the month for November 2022, "Glimmer Edge Stylized Floral". One of my favorite features of this month's glimmer plate is that the design is all connected in one piece instead of having separate pieces to manage. This makes foiling and die-cutting a breeze since there's no fussing with aligning all the elements perfectly during the process. You're able to use less foil and cardstock with this design. Thanks, Spellbinders for the efficiency. I also used Spellbinders embossing folder of the month for Nov. 22 to create the background panel. All these cards are A2 size.  Reverse foiling technique colored with distressed oxides. In this first design, I used a reverse foiling technique and a solid plate to pull the leftover image off an already-used piece of foil. I didn't get the foil transfer

“Sew Happy” Card Kit of the Month

Shaker card.  Hey, y’all! I hope everyone is doing well and having lots of fun creating beautiful things. For today's post, I’m backtracking to September 2022 card kit of the month from Spellbinders called “Sew Happy”. This card kit is filled with craft-themed items to create your cards. I made close to 40 cards with all the bits and bobs from the kit!! I'm never disappointed with the value of these card kits.  The card above and below are shaker cards I created using chipboard embroidery hoops included in the kit and a few pieces of acetate from my stash. The card base on top is one from my stash and the base on the bottom is one included in the kit. The only other elements I've added from my supplies are the glitter pieces inside the embroidery hoops and the Pops of Color and Nuvo drops. I appreciate the variety of pieces that are included in the kits because you're able to make cards in so many different styles.  Shaker card. Spellbinders "Sew Happy" Septem